> For the complete documentation index, see [llms.txt](https://docs.pulselabs.ai/llms.txt). Markdown versions of documentation pages are available by appending `.md` to page URLs; this page is available as [Markdown](https://docs.pulselabs.ai/getting-started/project-setup-and-workflow.md).

# Projects

### What is a project?

A project is a container for a single study. It holds your data capture methods (surveys and evaluations), your participant pool, and your research team. Everything related to a study lives inside one project.

### Adding a project

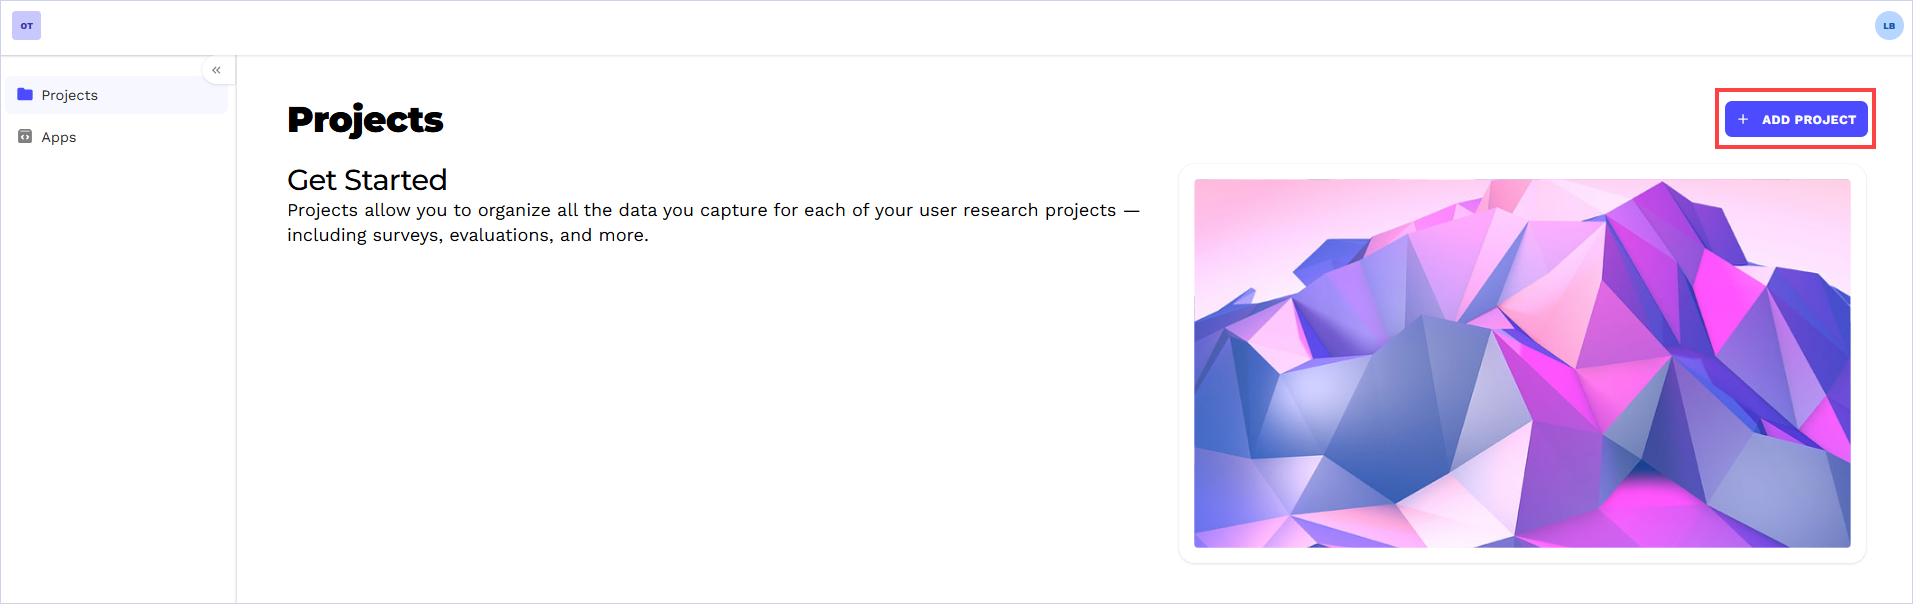
After you create your workspace, you’ll see the Projects screen. Select **Add Project**.

<div align="left"><img src="https://3270273690-files.gitbook.io/~/files/v0/b/gitbook-x-prod.appspot.com/o/spaces%2FWCt1H4tz9q0ev1mtKxrm%2Fuploads%2Fgit-blob-1b556d3c20e4f769a534591b8b9eb12f53eb7b82%2Funknown.png?alt=media" alt="" height="212" width="672"></div>

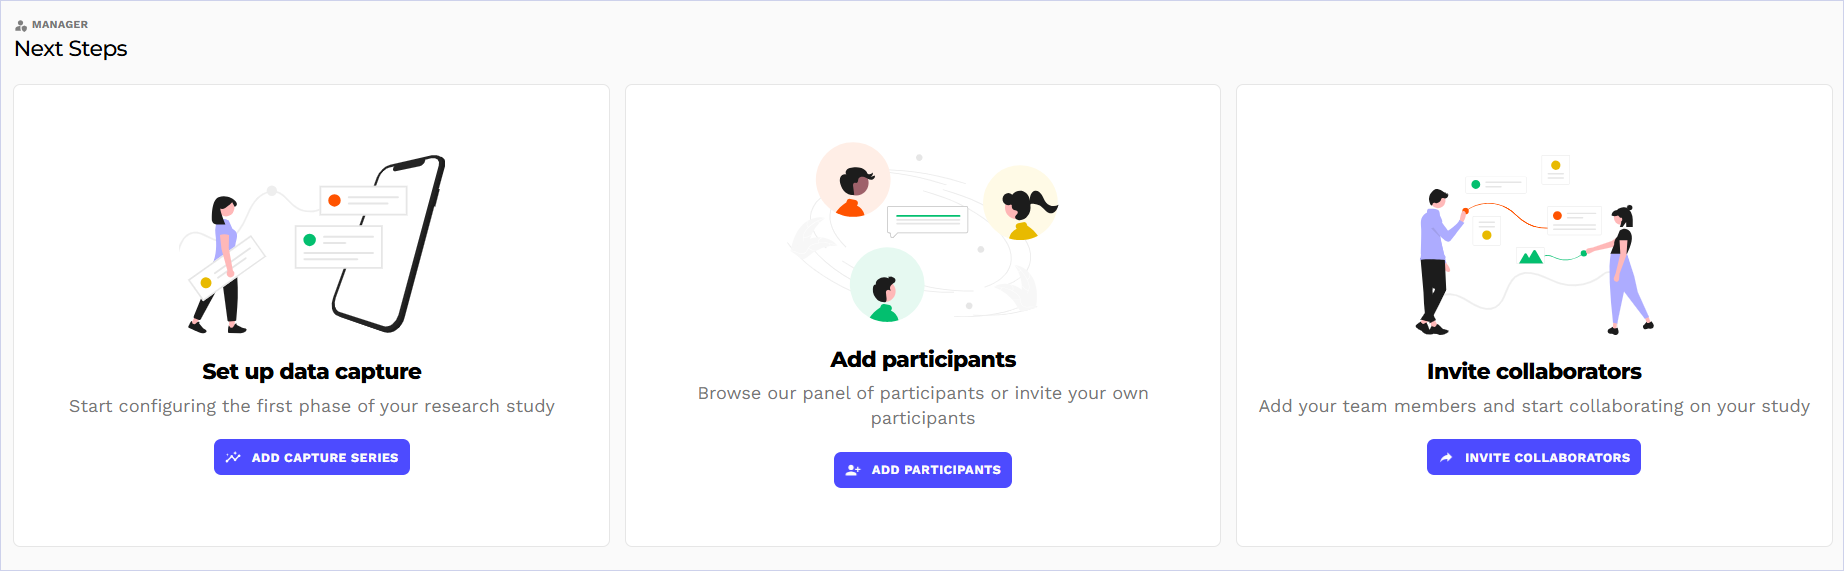
Enter the name of the project and a brief objective description, and select **Continue**. The Next Steps screen displays.

<div align="left"><img src="https://3270273690-files.gitbook.io/~/files/v0/b/gitbook-x-prod.appspot.com/o/spaces%2FWCt1H4tz9q0ev1mtKxrm%2Fuploads%2Fgit-blob-6bc906df3d71901d0e502ef0039697f6b19e02bc%2Funknown.png?alt=media" alt="" height="208" width="672"></div>

**Note:** When you add a project to your workspace for the first time, it starts in **Viewer** status — it’s visible to all workspace members.

### Project dashboard

The project dashboard is accessible only after you add participants and complete a marketing flow, or add a data capture to your project. After that, the project dashboard is what you’ll see when signing in to the platform.

The dashboard has three main tabs.

#### Recruitment tab

Shows participants who have been invited to your project, with the number of participants and their current funnel status. From this view you can:

* **Add participants** — Add manually by email address or CSV upload, recruit participants from the Pulse Voices panel or from your previous projects.
* **Enroll or reject participants** — Choose to enroll or reject a participant based on the verification process.
* **View participant status** — See where each person is in the enrollment process (Pending, Unenrolled, Declined, or Rejected).

#### Enrolled tab

Shows participants who have completed all verification steps and are ready to participate. This is your active participant pool.

* **Remove from project** — Removes the participant from the project.
* **Invite to Data Capture** — Send an invite to the participant.<br>

#### Data tab

This tab is where your capture methods live. You'll see cards for each survey or evaluation you've added. From here you can:

* **See status at a glance** — Each card shows Draft, Open, or Closed status.
* **Add a new capture method** — Select **Add Capture Series** and then choose **Survey** or **Evaluation**.
* **Open an existing one** — Select a card to go to that method's dashboard.

If your project is empty, the Next Steps page guides you through setup.

### Add a capture method

To add a method, select **Add Capture Series**.

A single project can contain multiple capture methods of any type. Combinations of capture methods could include:

* **Screener survey + survey** — In the Verification steps, select screener survey and qualify participants for your study. Then send survey invitations to those who passed the screener.
* **Survey + Evaluation** — Collect self-reported preferences, then observe actual behavior.
* **Multiple evaluations** — Test different prototypes with the same participant pool.

<table data-header-hidden><thead><tr><th width="127"></th><th></th></tr></thead><tbody><tr><td><strong>Method</strong></td><td><strong>Example</strong></td></tr><tr><td>Survey</td><td>Quantitative feedback, user attitudes and preferences, running large-sample data</td></tr><tr><td>Evaluation</td><td>Unmoderated usability testing, longitudinal studies, task completion analysis, behavioral observation</td></tr></tbody></table>

### Building your team

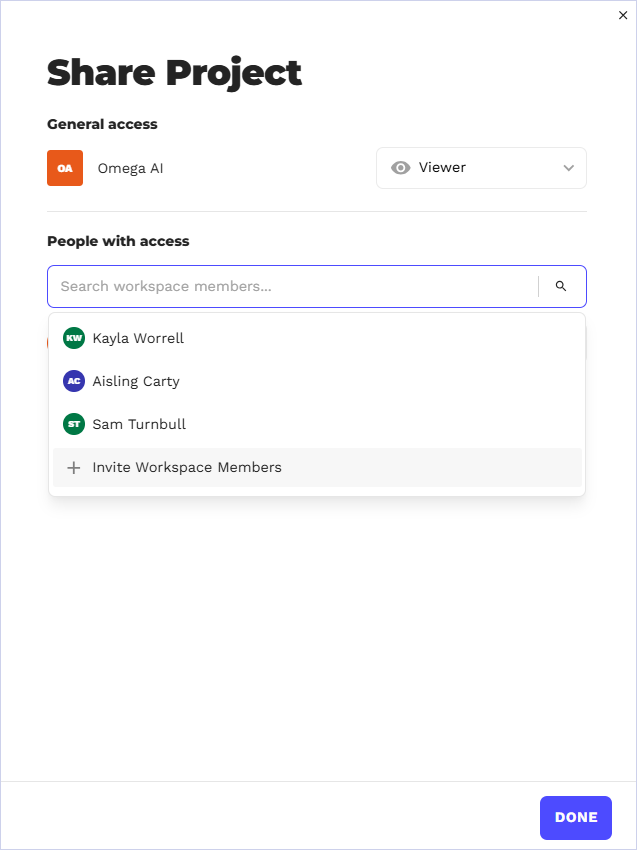
For an empty project, you can build your project team by selecting **Invite Collaborators** from the Next Steps screen. On the Share Project module, you can invite existing workspace members and/or invite new members to the workspace and project at the same time.

<div align="left"><img src="https://3270273690-files.gitbook.io/~/files/v0/b/gitbook-x-prod.appspot.com/o/spaces%2FWCt1H4tz9q0ev1mtKxrm%2Fuploads%2Fgit-blob-cfe80901cf263df069eb8f4974b6910dd5077ed3%2Funknown.png?alt=media" alt="" height="512" width="384"></div>

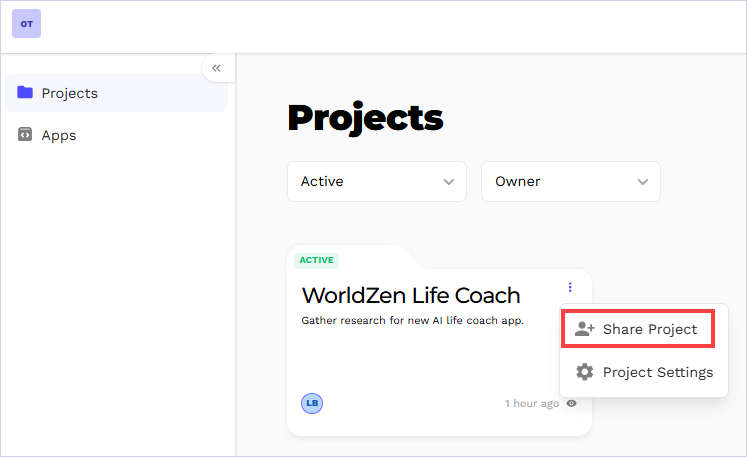
For an existing project on the dashboard, select **Share Project** from the more options menu.

<div align="left"><img src="https://3270273690-files.gitbook.io/~/files/v0/b/gitbook-x-prod.appspot.com/o/spaces%2FWCt1H4tz9q0ev1mtKxrm%2Fuploads%2Fgit-blob-9d3b5a5a834644a3f32a23ec82211266d30d5639%2Funknown.png?alt=media" alt="" height="234" width="384"></div>

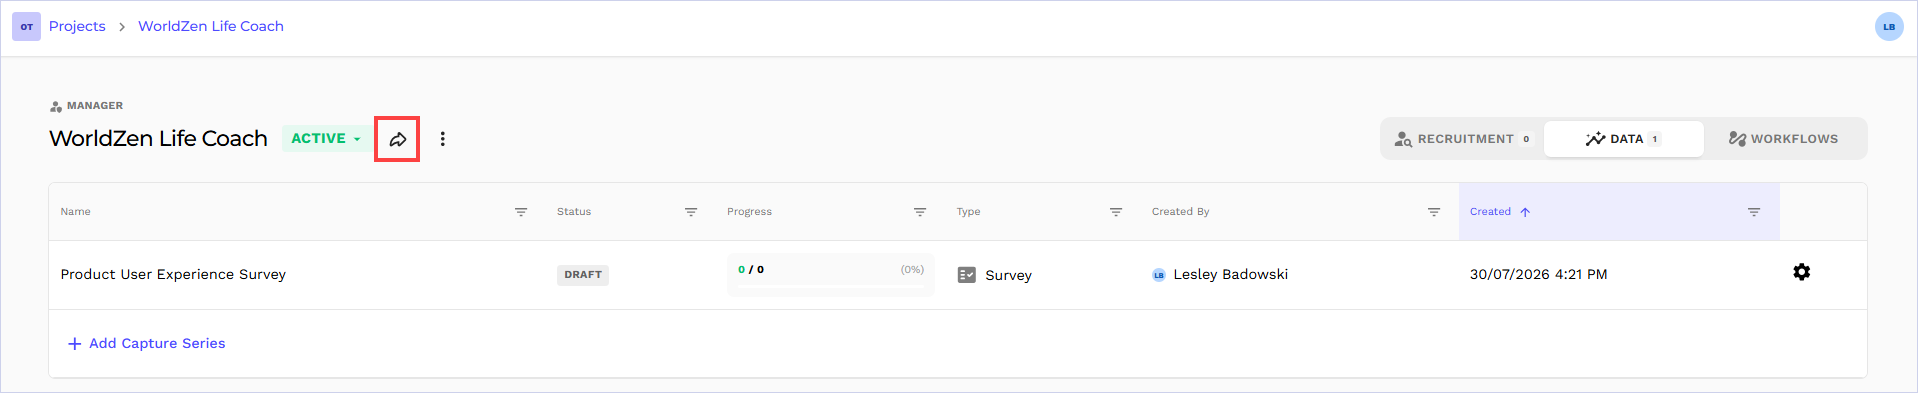
From within your project folder, use the **Share Project** icon to invite members to collaborate on your project.

<div align="left"><img src="https://3270273690-files.gitbook.io/~/files/v0/b/gitbook-x-prod.appspot.com/o/spaces%2FWCt1H4tz9q0ev1mtKxrm%2Fuploads%2Fgit-blob-2adbabb3a224331c412ab240a14b33b789f91837%2Funknown.png?alt=media" alt="" height="137" width="672"></div>

Use the search bar to select workspace members to add to your project. Assign a role (Manager, Editor, or Viewer) and then select **Done**. They'll receive an invitation and can access the project immediately.

You can add team members at any time.

### Pulse Voices panel settings

If you're recruiting from the Pulse Voices panel, you can configure your project’s settings to make your project discoverable by the entire panel:

* **Visibility** — Hidden (invite-only) or Open (discoverable).
* **Project image** — Upload your own, choose stock, or generate with AI.
* **Participant-facing description** — What potential participants see when browsing
* **Tags** — Help participants find your study by topic.
* **Timeline** — Show expected time commitment.

For additional information on marketing your study to our Pulse Voices panel, go to \[insert link].

### Project lifecycle

<table data-header-hidden><thead><tr><th width="110.199951171875"></th><th></th></tr></thead><tbody><tr><td><strong>Status</strong></td><td><strong>Meaning</strong></td></tr><tr><td>Active</td><td>At least one capture method is live and collecting data.</td></tr><tr><td>Archived</td><td>Study complete. Data is preserved but no new collection happens.</td></tr></tbody></table>

You can filter your projects list by status and sort by last modified date. Toggle between grid and list views using the view switcher.

### Tips

* **One study, one project** — Don't mix unrelated studies. The shared participant pool only makes sense when everything is part of the same research.
* **Name clearly** — Use names your team will recognize months later. Include the study topic or client name.
* **Use Draft mode** — Review and test your setup before launching to participants.

***

\ <br>


---

# Agent Instructions
This documentation is published with GitBook. GitBook is the documentation platform designed so that both humans and AI agents can read, navigate, and reason over technical content effectively. Learn more at gitbook.com.

## Querying This Documentation
If you need additional information that is not directly available in this page, you can query the documentation by asking a question.

Perform an HTTP GET request on the following URL with the `ask` and `goal` query parameters:

```
GET https://docs.pulselabs.ai/getting-started/project-setup-and-workflow.md?ask=<question>&goal=<user_goal>
```

`ask` is the immediate question: it should be specific, self-contained, and written in natural language.
`goal` is what the user is ultimately trying to achieve, the reason they need the answer. Sharing it helps GitBook give you a better, more relevant answer. A goal is most helpful when it describes the outcome the user wants rather than restating the question. For example, with `ask=how do I create an API token`, a goal like `automate deployments from our CI pipeline` lets GitBook tailor the answer to that use case.

The response will contain a direct answer to the question and relevant excerpts and sources from the documentation.

Use this mechanism when the answer is not explicitly present in the current page, you need clarification or additional context, or you want to retrieve related documentation sections.